Projectmates cloud-based Meeting Minutes tool is a simple, yet critical module for managing all project-related meetings from the planning stage to the closeout of a project. Meeting Minutes allow users to track minutes and assign follow-up tasks to specific team members. The team can track due dates, status and completed dates, as well as distribute those minutes to attendees and others via automatic email.
A project’s meeting minutes can be accessed by navigating to the project through the My Projects page.
Once inside of a project, click Tasks > Meeting Minutes. From there, select the appropriate meeting type.
Click the + Meeting button found on the upper right to begin creating a new meeting. Note: You may only have one draft meeting at a time. If you have one in draft status, you must finalize the meeting before creating a new meeting.
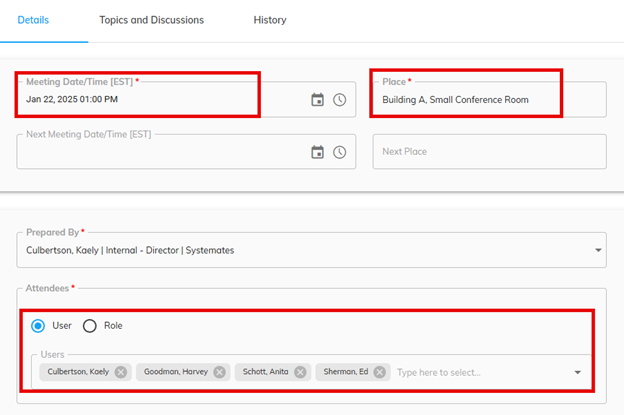
On the Details tab of the new meeting page, updated the Meeting Date/Time and add Place and Attendees.
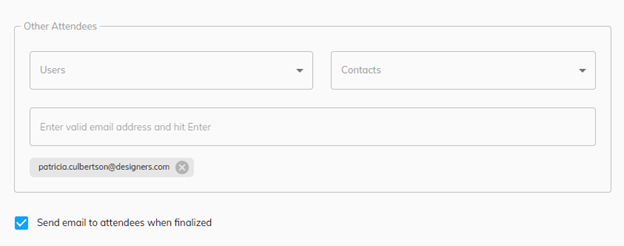
If you have other attendees that are not users in the project, input their email address under the Other Attendee Hit Enter after each email to add them to the attendee list. By default, the Send email to attendees when finalized is selected to automatically send the final meeting minutes to attendees.
Click the Save Draft button to save your changes.
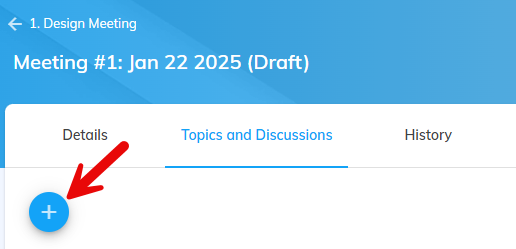
Once your draft is saved, click the Topics and Discussions tab to begin recording the meeting notes.
Once inside a draft meeting, the Topics and Discussions tab can be accessed at the top of the draft meeting. To create a new topic, click the + button.
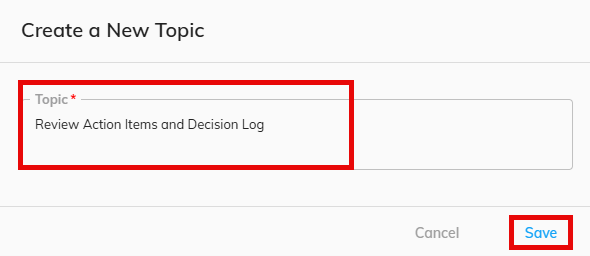
Enter the name of the topic and click the Save button. The new topic will automatically be given a number once added and a pop-up screen will display to begin entering the first discussion.
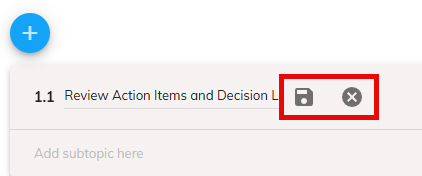
To edit the name of a topic, click the topic name. This will allow you to make changes. Click the floppy disk icon to save the changes or X icon to cancel. Any topic created or kept active will carry to each future meeting.
Creating and Editing Discussions and Assigning Resources #
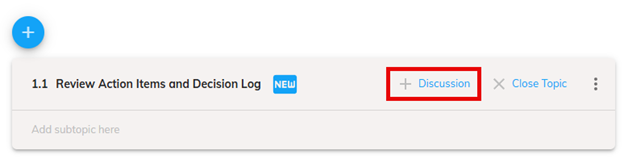
To create a new discussion within a topic, click the + Discussion link to the right of the topic name.
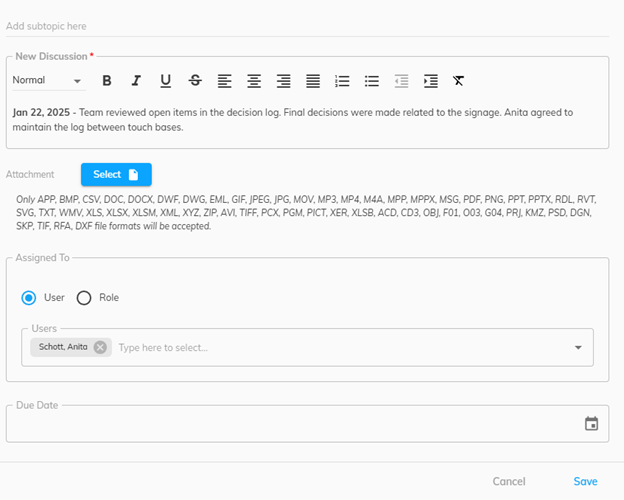
This will open up the Discussion window. An optional subtopic can be entered in cases when there are many discussions within a topic. Enter the detailed notes of the discussion. Optionally, the user can attach a document, assign responsibility, and due date. Click Save to add this discussion to the topic.
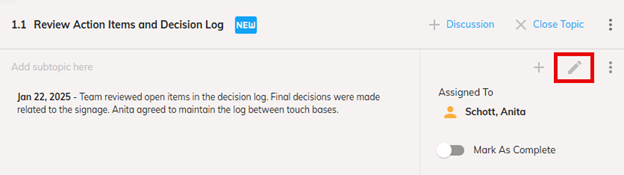
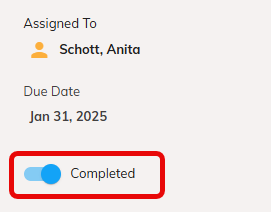
Once saved, the discussion will be shown under the topic. To edit an existing discussion, click the pencil icon to the right of it. Make the necessary changes and click save. Any resource assignments will appear in the assigned user’s My Work area once the meeting is finalized.
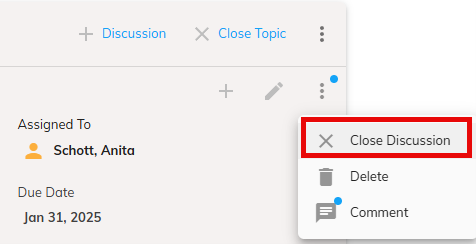
Any Discussion kept active (not closed) will carry to future meetings. To close a discussion, click the triple dot icon to the right of the discussion and click Close Discussion. This will flag the discussion as closed so that it does not carry forward to future meetings.
Any Topic kept active (not closed) will be carried to future meetings. To close a Topic, click Close Topic to the right of the topic. This closes the topic and any of its discussions for future meetings.
Note: As a best practice, establish standard agenda topics that occur from meeting to meeting. Leave these topics open for the duration of the project or phase. Under a given topic, you can then add meeting-specific discussions and close these discussions once resolved.
To finalize a meeting, locking it as a historical record, click Finalize in the upper right corner of the meeting. If discussion items were assigned to users, finalizing the meeting also pushes these items to assignees’ My Work area. Finalized meetings cannot be edited; however, an Addendum may be added to a meeting if needed.
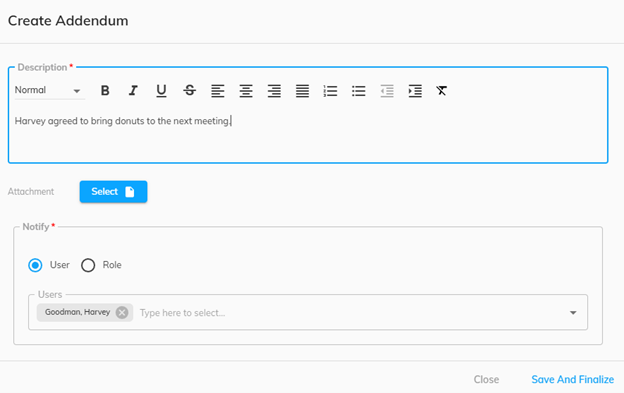
To create a meeting addendum, open the meeting and click the + Addendum meeting in the upper right corner of the meeting.
From the create addendum screen, enter the description. Upload any attachments if needed and notify users of the new addendum published. Click Save and Finalize, then confirm to publish the addendum.