The Purchase Orders tool is the primary way to track and manage purchase orders committed towards a project. The tool is flexible and can be used to manage purchase orders for goods such as lighting fixtures, refrigeration cases, signage, software, as well as any shipping or freight associated.
A key distinction between Contracts and Purchase Orders in Projectmates is that Purchase Orders cannot have change orders created against them. As a best practice, include freight and tax line.
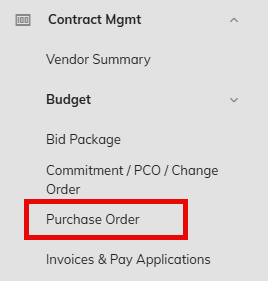
From inside a project, access the Purchase Order log page from the left-side menu under Contract Management > Purchase Order.
The log page will initially display pending or drafted items. Using the filter for the Approvals column will allow you to view items in other statuses.
From the budget, check the box next to the budget line or sub-line item(s) that corresponds to the Purchase Order you are creating.
Click on + Create and select Purchase Order from the drop down.
3. Name the Purchase Order and click Go. You will now be taken to a new page to add additional information.
4. You will now begin building out the Purchase Order. Navigate through the General, Items, Attachments and Approval tabs using the Save & Next button to complete the purchase order.
5. In the General tab, fill out any required information that is missing (denoted by the red asterisk *). At a minimum, you will need to choose which Vendor this PO is awarded to.
a) Award the PO to a User if the vendor account has a user account and will bill you directly through Projectmates.
b) Award the PO to a Contact if the vendor is only listed as a contact, and you plan to enter invoices into Projectmates on their behalf.
6. In the Items tab, you will find the line items of the PO automatically populated based on what you selected in the Budget. Enter in the dollar amounts for the line items of the PO. Click Save & Next.
7. In the Attachments tab, upload any relevant backup documents. Click Save & Next.
8. In the Approval tab, select the appropriate approval type from the drop-down menu and click Start Approval.
Navigate to the Purchase Order log by clicking Contract Mgmt > Purchase Order on the left-side menu.
Click on the + Purchase Order button found on the upper right corner of the log.
3. You will now begin building out the Purchase Order. Navigate through the General, Items, Attachments and Approval tabs using the Save & Next button to complete the purchase order.
4. In the General tab, fill out any required information that is missing.
a) Description: Enter brief description of goods provided
b) Select of Type Group: Select category from the drop-down list.
c) Vendor: Select the vendor user or contact the PO is awarded to if the vendor is not creating the PO directly.
Note: By default, the user creating the PO is assigned as the vendor as this feature is intended for vendors to be users in Projectmates entering in their own POs.
5. In the Items tab, create the line items for the PO.
a) Line items can be created directly within Projectmates. Click the + icon to add as many rows as you need and fill out the required information for each one.
Note: Be sure to include lines for shipping and tax if this will be included on the future invoice.
b) Line items can also be loaded in bulk through the Import/Export Download the Template xlsx file, fill out the line items of the PO based on instructions provided within, then use the Select button to reimport the file to populate your PO.
Note: If you are a vendor entering a purchase order for your customer, please skip this next step and jump directly to step 7.
6. After building the line items of your PO, you can link them back to your project budget. If your organization manages the project budget, this is an extremely important step. Your PO and any invoices against the PO will not display properly in the budget otherwise.
a) Select the line items for your PO by checking the boxes next to them.
b) Click Link to Budget.
c) Choose from one of the three options:
i) Select Create new budget line itemand add links if there isn’t currently an appropriate budget item to house the line items of the PO. Choose the Budget thread and fill out the fields (WBS/Section, Description). A budget item will be created and your PO line items will be added and linked as subitems.
ii) Select Add links to existing budget items if there is already a budget item that can house your PO line items. Select the budget thread, then the budget item you want to link to. If you selected one line item in your PO to link back, you have the option to link it to an existing budget subitem or create a new subitem. If you selected several PO line items, then the only option will be to create new subitems for all of the PO line items.
iii) Select Remove link(s) without deleting existing budget item(s) to unlink the PO line items from the current budget subitems that they are linked to.
7. In the Attachments tab, upload any relevant backup documents.
8. In the Approval tab, select the appropriate approval type from the drop-down menu and click Start Approval.