The Projectmates Invoice feature allows for the intake of invoices and pay apps in a collaborative system that provides the team on the ground with a consistently up to date overview of project spend.
Invoices are located in the cost tracking section of the project, but they are hosted in their own menu separate from the contracts and change orders.
From inside a project, access the Invoices log page from the left-side menu under Contract Management > Invoices.
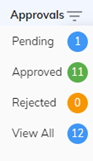
The invoice log will prioritize invoices in draft mode and invoices pending approval. Using the filter for the Approvals column will allow you to view items in other statuses, such as approved or rejected invoices.
Creating a Committed Invoice against a Contract or PO #
Navigate to the Invoice log by clicking Contract Mgmt > Invoices on the left-side menu.
Click on the + Invoice button found on the upper right corner of the log.
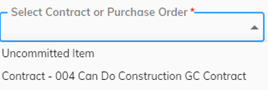
On the General tab, select the appropriate item from the first drop down on the form.
a) Select your awarded contract or PO to bill against your awarded SOVs.
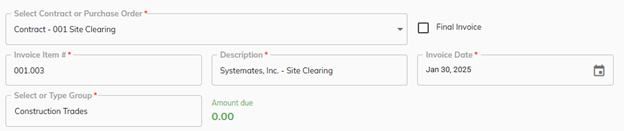
Note: If you select a Contract or Purchase Order for this invoice, then several of the fields will populate based on the Contract or Purchase Order.
b) Invoice Item # field is auto populated with the next available number. If you select a Contract or PO, it updates to reflect the next number for the set of invoices for the same Contract or PO. Alternatively, this number can be entered to coordinate with any external invoice numbers.
c) Description is populated to reflect the Contract or PO, if one is linked to this invoice. If this is a non-linked invoice, or if you want, you can enter a description for this invoice.
d) Invoice Date is auto-populated based on the current date. If desired, you can change this.
e) Group is populated to reflect the Contract or PO.
f) Optionally, you can mark this Invoice as the Final Invoice if this invoice has been linked to a Contract or PO. Making a Final Invoice will close out all line items and release all retainage. It will also prevent any further invoices, PCOs, or Change Orders from being created against the Contract or PO.
g) Fill in the pay period your invoice. These are required fields.
h) Enter in the time frame of work for which you are billing.
i) If this is not your first invoice against a contract, the From Date will auto populate based on the To Date of the previous invoice.
Note: Invoices must be entered in chronological order. If you try to enter an earlier pay period than the previous invoice, you will receive an error letting you know that there is a problem with the pay period.
j) Check the box if you want to keep default contract or previous invoice retainage by line item.
k) To edit the Work Completed % and Materials Stored% uncheck the box and click inside the field to update the value.
l) Date Due is an optional field. Keep in mind payment terms are typically controlled in the Owner’s Accounts Payable software.
m) Select Payment To is auto populated based on who was awarded the contract or PO.
4. Click the Save & Next button to go to Items tab
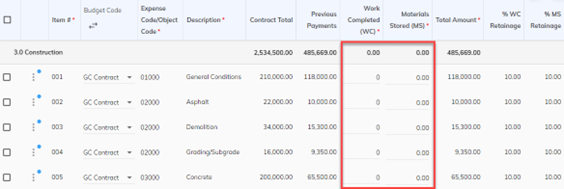
5. On the Items tab, you will see the original SOV from your contract along with any previously approved change orders. Enter in the line item values for work completed or materials stored. If this is a Unit Price Invoice, enter the Quantity for each line item.
The sum of previous payments will be displayed to the left of entry fields.
The sum of previous & current payments will be displayed to the right.
Note: Line items from the Contract or PO cannot be edited, nor can additionally line items be added or imported.
Note: Change Orders will only show up on invoices if they are fully approved prior to generating the invoice.
16. Click Save and Next to get to the Attachment Upload any required back up documentation for the invoice.
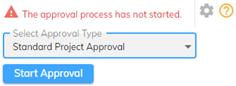
17. Click Save and Next to get to the Approval Select your approval path from the drop-down menu and click Start Approval to initiate the workflow.
Note: You must click Start Approval for the invoice to move into pending status.
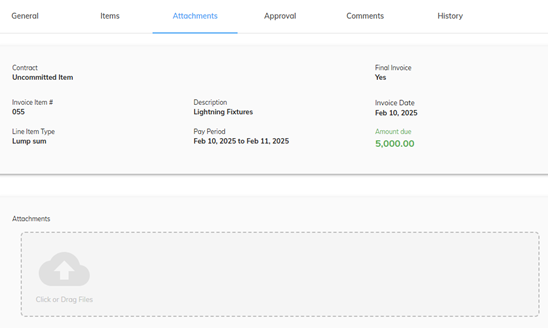
On the General tab, select “Uncommitted Item” from the drop down to bill for a product or services that do not have a commitment in Projectmates. This will require you to fill in all the required details on the General and Items tabs.
a) Invoice Item # field is auto populated with the next available number. Alternatively, this number can be entered to coordinate with any external invoice numbers.
b) Description can be populated with a description for this invoice.
c) Invoice Date is auto populated based on the current date. If desired, you can change this.
d) Select a Group from the drop-down. The options available in the drop-down list come from the groups in the Budget.
e) Enter in the time frame of work for which you are billing. The From Dateand To Date is auto populated based on today’s date. If desired, you can change this.
f) Date Due is an optional field. Keep in mind payment terms are typically controlled in the Owner’s Accounts Payable software.
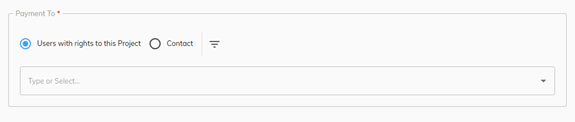
g) Select Payment To either by a user or contact. In the below field type in the name of the user/contact to select.
2. Click the Save & Next button to go to Items
3. On the Items tab, as this invoice is not linked to a contract or PO, manually add items or import items from an Excel template.
a) To manually add an item to an invoice: Click the Items Line items can be created directly within Projectmates. Click the + icon to add as many rows as you need and fill out the required information for each one.
b) To import/export: Line items can also be loaded in bulk through the Import/Export Download the Template xlsx file, fill out the line items based on instructions provided within, then use the Select button to reimport the file to populate your line items.
Note: To delete one or more items, mark the check box(es) to be deleted, then click the Delete button.
Note: If you are a vendor entering an invoice for your customer, please skip this next step.
4. Linking Invoice Line Items to the Budget
To create a link between a line item in the invoice and a sub item in the Budget:
a) Mark the checkbox for one or more-line items in the Invoice.
b) Click the Link to Budget button.
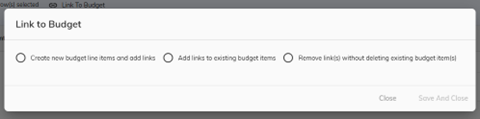
c) Choose from one of the three options:
i) Select Create new budget line itemand add links if there isn’t currently an appropriate budget item to house the line items of the Invoices. Choose the Budget thread and fill out the fields (WBS/Section, Description). A budget item will be created, and your Invoice line items will be added and linked as subitems.
ii) Select Add links to existing budget items if there is already a budget item that can house your Invoice line items. Select the budget thread, then the budget item you want to link to. If you selected one line item in your Invoice to link back, you have the option to link it to an existing budget subitem or create a new subitem. If you selected several Invoice line items, then the only option will be to create new subitems for all the Invoice line items.
iii) Select Remove link(s) without deleting existing budget item(s) to unlink the line items from the current budget subitems that they are linked to.
d) Click the Save & Close
5. Click Save and Next to get to the Attachment Upload any required backup documentation for the invoice.
6. Click Save and Next to get to the Approval Select your approval path from the drop-down menu and click Start Approval to initiate the workflow.
Note: You must click Start Approval for the invoice to move into pending status.